
Graphing Inequalities Worksheet Answers: A Comprehensive Guide
Understanding Graphing Inequalities
Graphing inequalities can be a challenging topic for many students, but with the right resources and practice, it can become a breeze. If you're struggling to find the answers to your graphing inequalities worksheet, don't worry, we've got you covered. In this article, we'll provide a comprehensive guide on how to graph linear inequalities, including examples and step-by-step instructions.
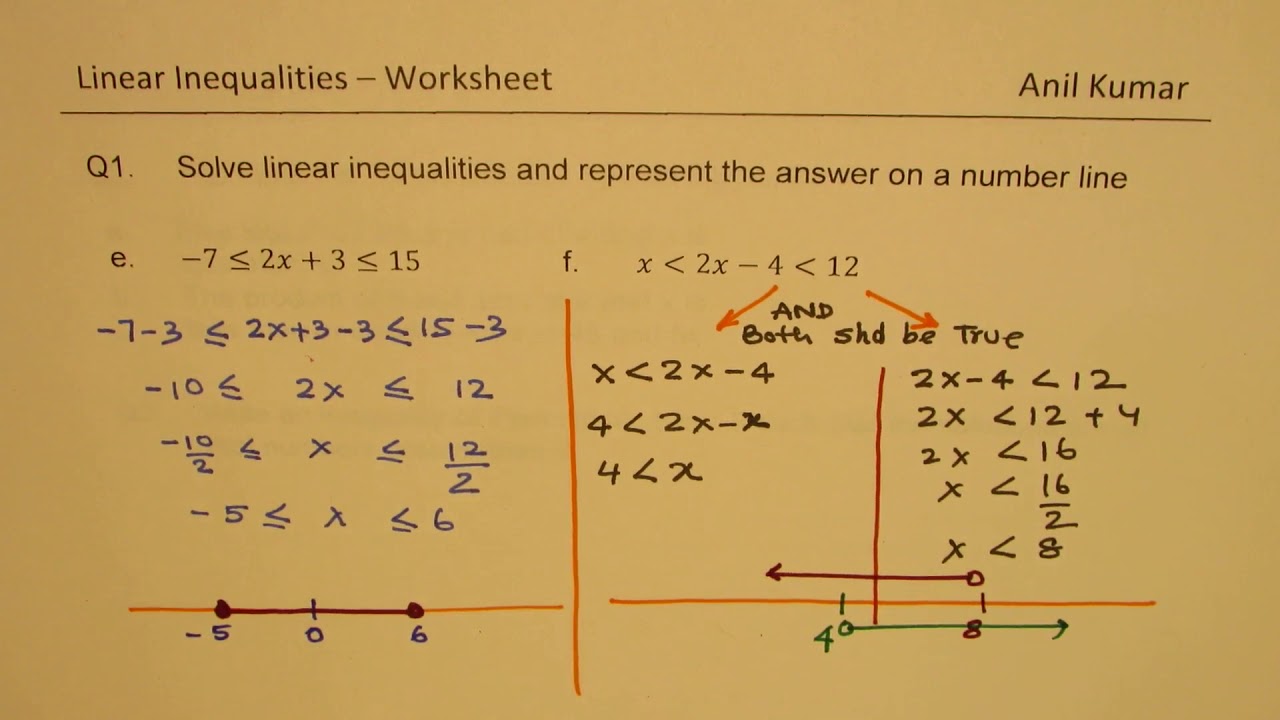
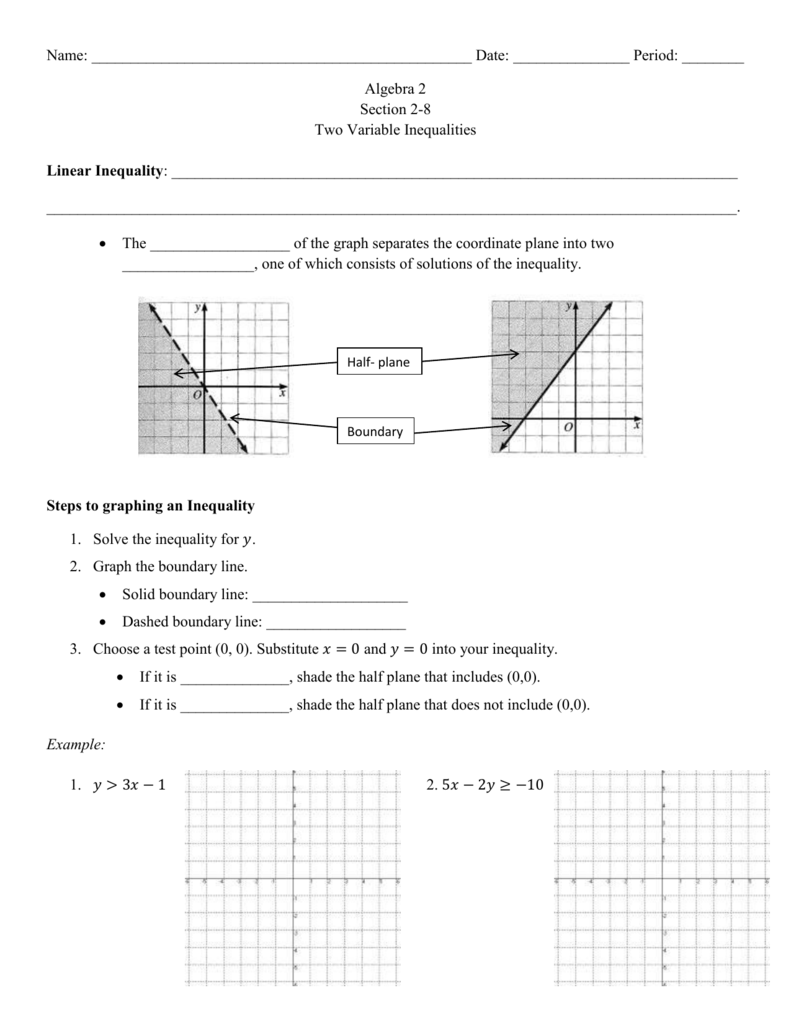
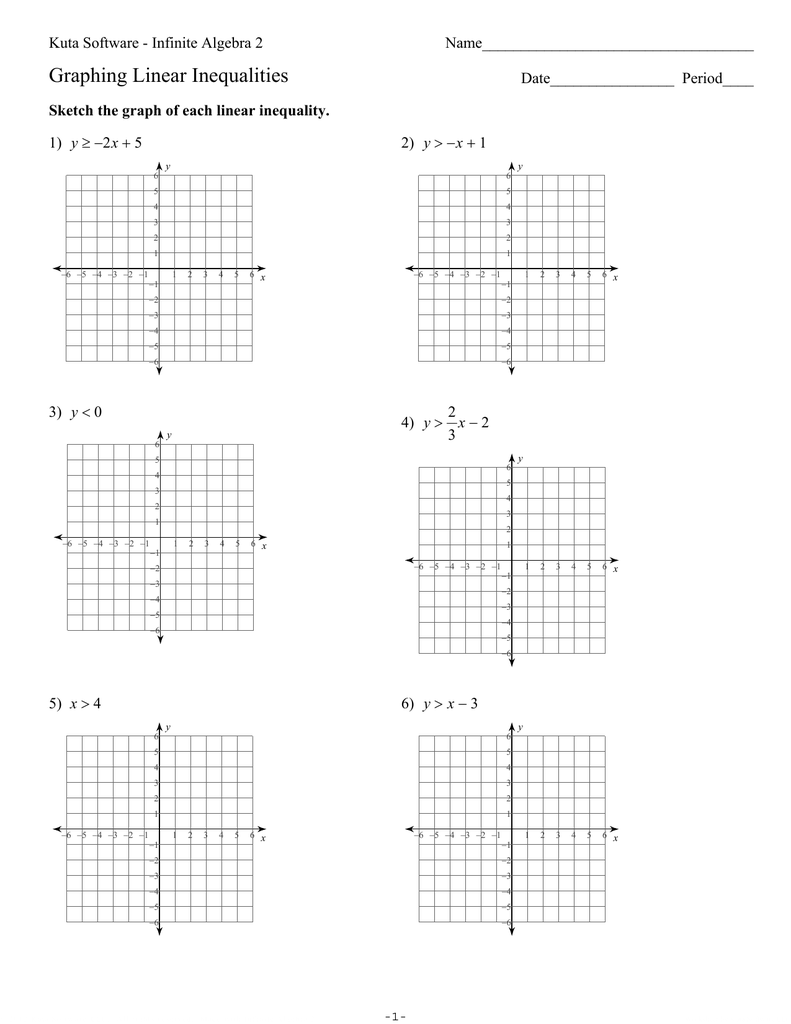
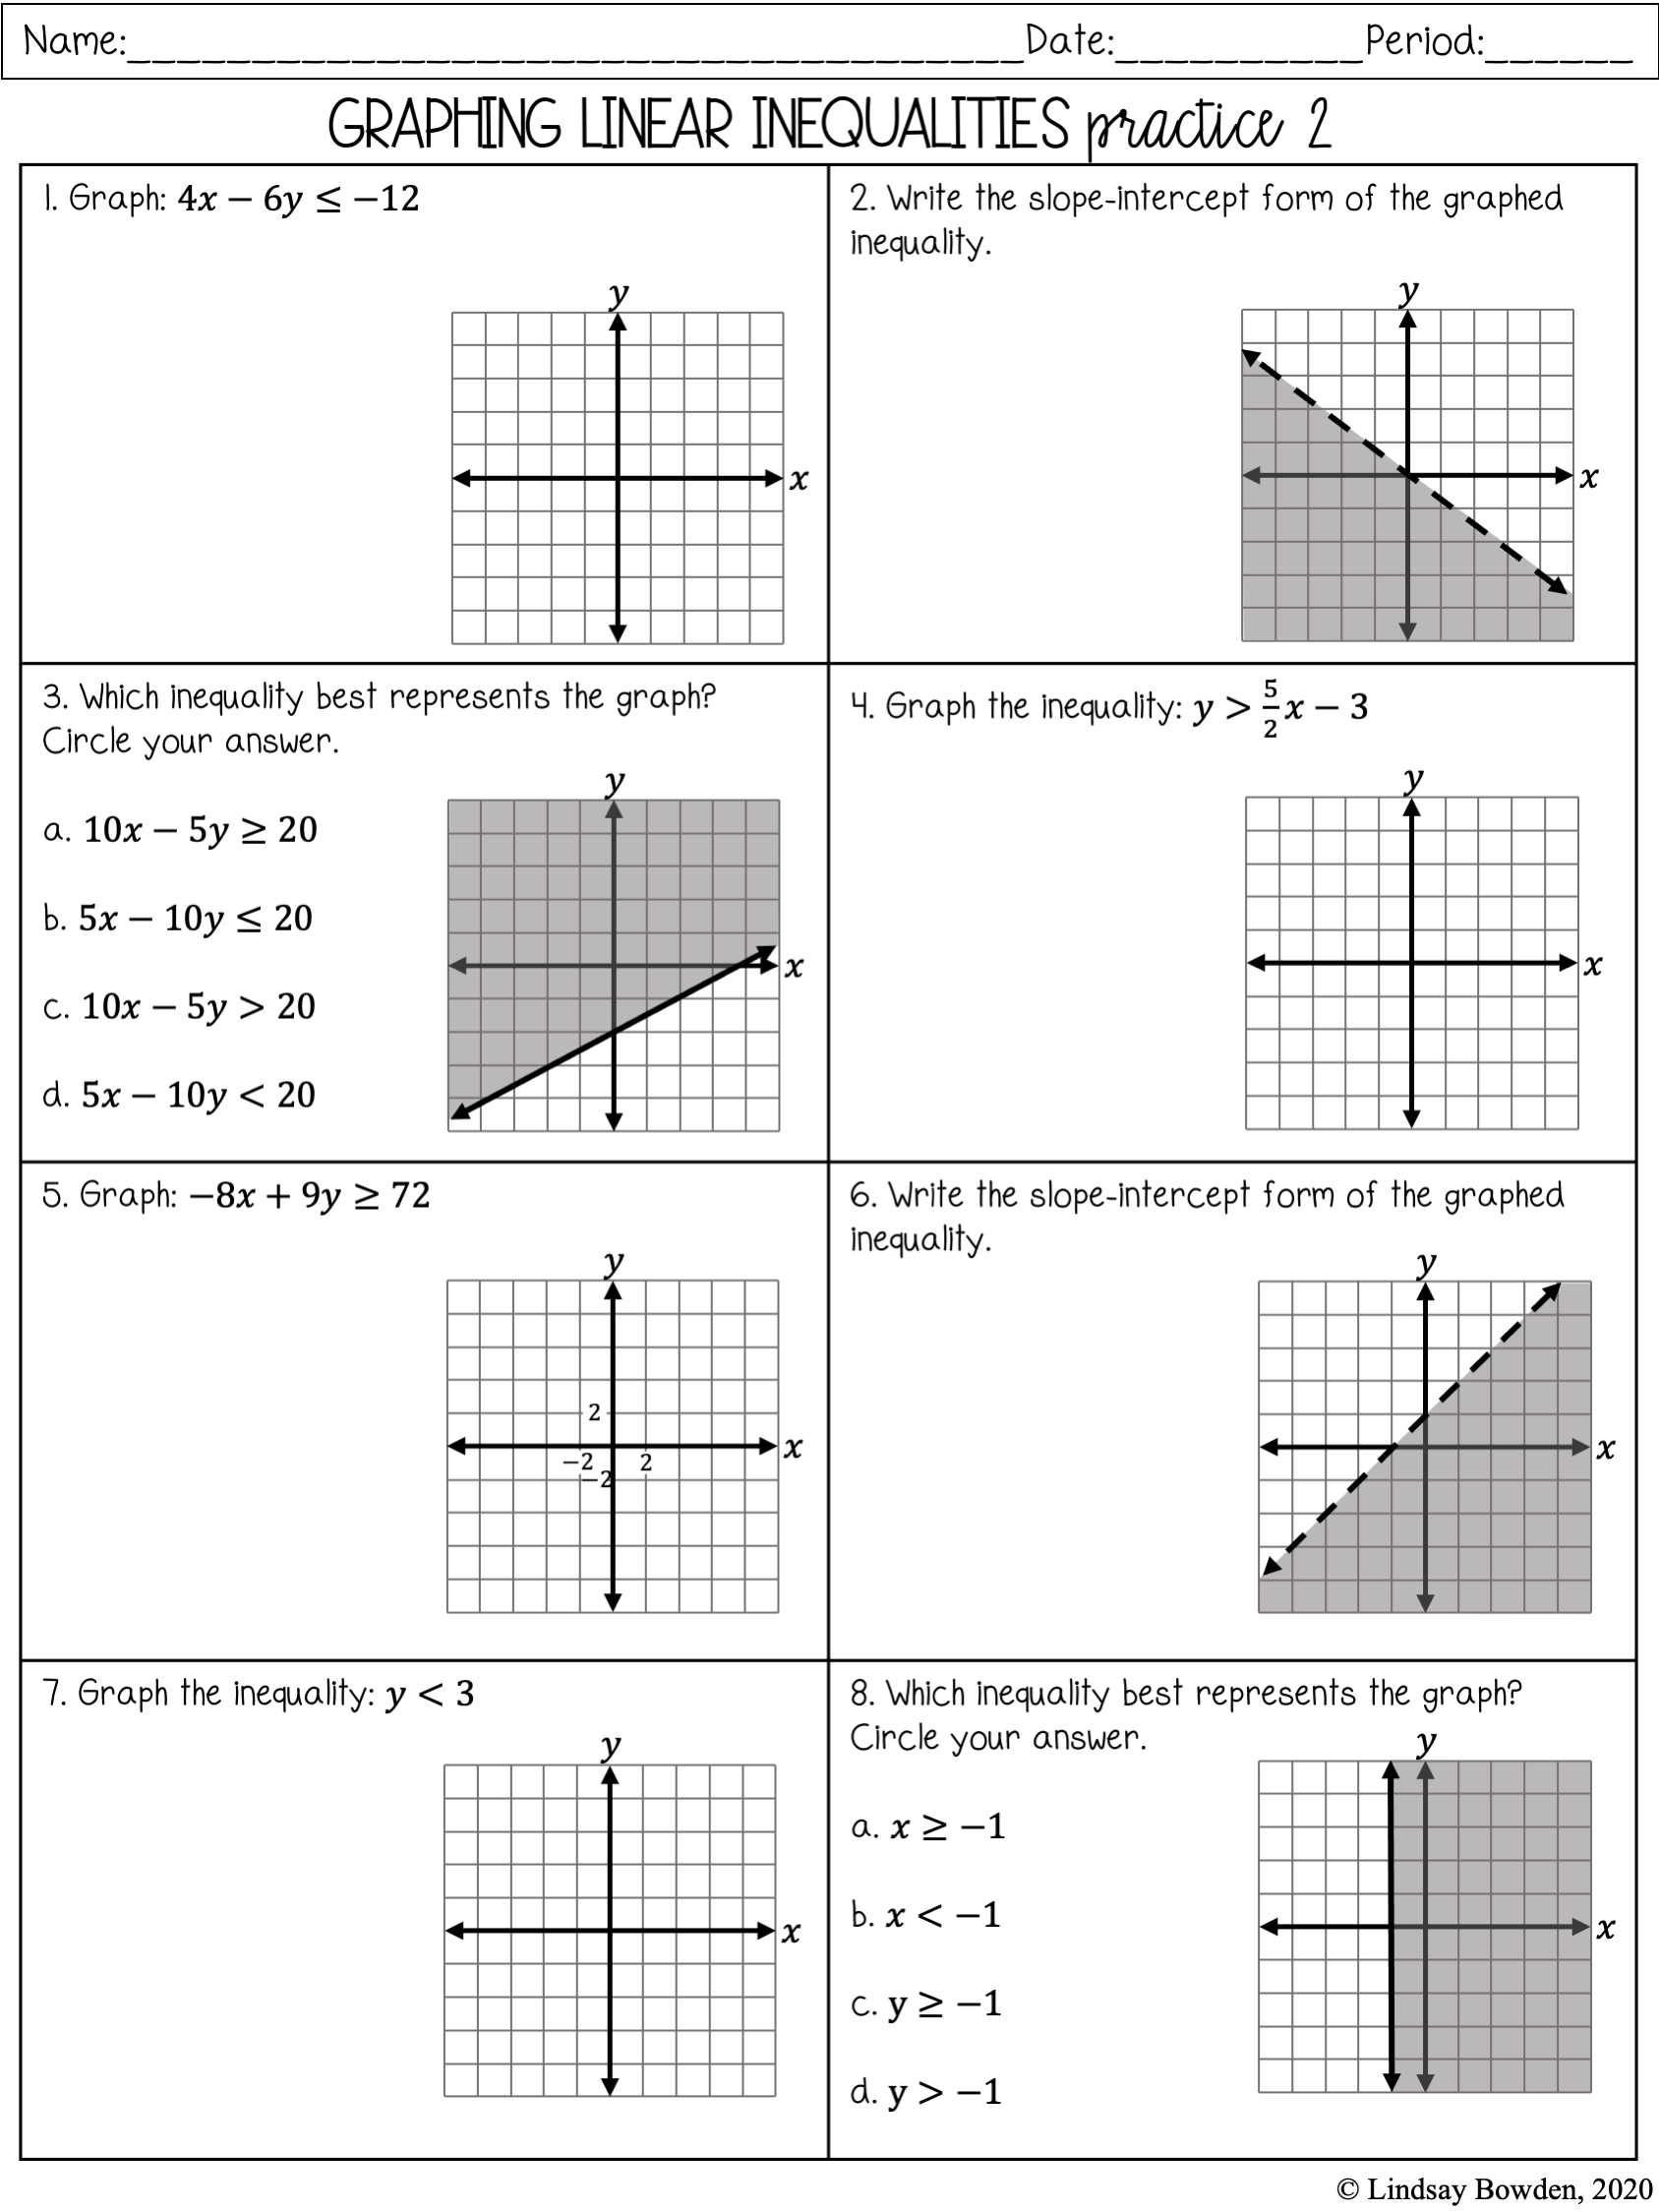
To start, it's essential to understand the basics of graphing inequalities. A linear inequality is an inequality that can be written in the form of a linear equation, where the variable is raised to the power of one. For example, 2x + 3 > 5 is a linear inequality. To graph this inequality, we need to first solve for x by isolating the variable on one side of the inequality.
Solving Graphing Inequalities Worksheets
When graphing linear inequalities, we use a number line to represent the solution set. We plot the points that satisfy the inequality and then draw a line or a curve to represent the solution set. For example, if we have the inequality x > 2, we would plot the point (2,0) on the number line and then draw an arrow to the right to represent all the points greater than 2. We can also use online tools and graphing calculators to help us visualize the solution set and check our answers.
Now that we've covered the basics of graphing inequalities, let's move on to solving graphing inequalities worksheets. To solve these worksheets, we need to follow a step-by-step approach. First, we need to read the problem carefully and identify the type of inequality we're dealing with. Then, we need to solve for the variable by isolating it on one side of the inequality. Finally, we need to graph the solution set on a number line or a coordinate plane. With practice and patience, you'll become proficient in solving graphing inequalities worksheets and be able to find the answers with ease.