How to Make Printable Grids in Illustrator
Getting Started with Grid Creation
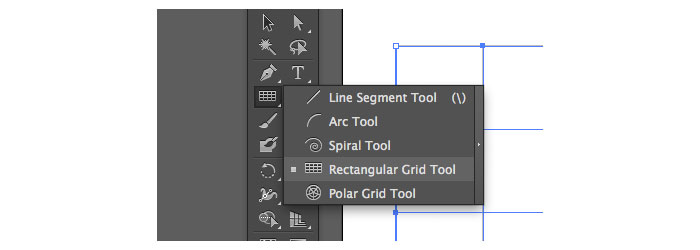
Adobe Illustrator is a powerful tool for creating custom printable grids. Whether you need graph paper for math problems, a layout grid for design projects, or a simple grid for organizing notes, Illustrator makes it easy to create and print your own grids. In this article, we'll show you how to make printable grids in Illustrator, from setting up your document to customizing your grid template.
To start creating a printable grid in Illustrator, open a new document and set the dimensions to your desired size. You can choose from a variety of units, including inches, centimeters, or pixels. Next, go to the 'View' menu and select 'Show Grid' to turn on the grid visibility. You can then adjust the grid settings to your liking, including the gridline color, spacing, and style.
Customizing Your Grid Template
Once you have your grid set up, you can customize it to fit your specific needs. You can add text, images, or other elements to your grid, or use the 'Transform' tool to adjust the grid's size and orientation. You can also use the 'Pattern' feature to create repeating patterns, such as a grid of dots or a checkerboard design.
With your grid template complete, you can print it out on your preferred paper type or save it as a PDF for digital use. You can also export your grid as a JPEG or PNG file for use in other design projects. Whether you're a student, designer, or simply someone who loves to organize, creating custom printable grids in Illustrator is a great way to add some structure and style to your work. By following these simple steps, you can create professional-looking grids that meet your unique needs and preferences.