Origami Corner Bookmark Printable Instructions: A Fun and Easy DIY Project

Getting Started with Origami Corner Bookmark
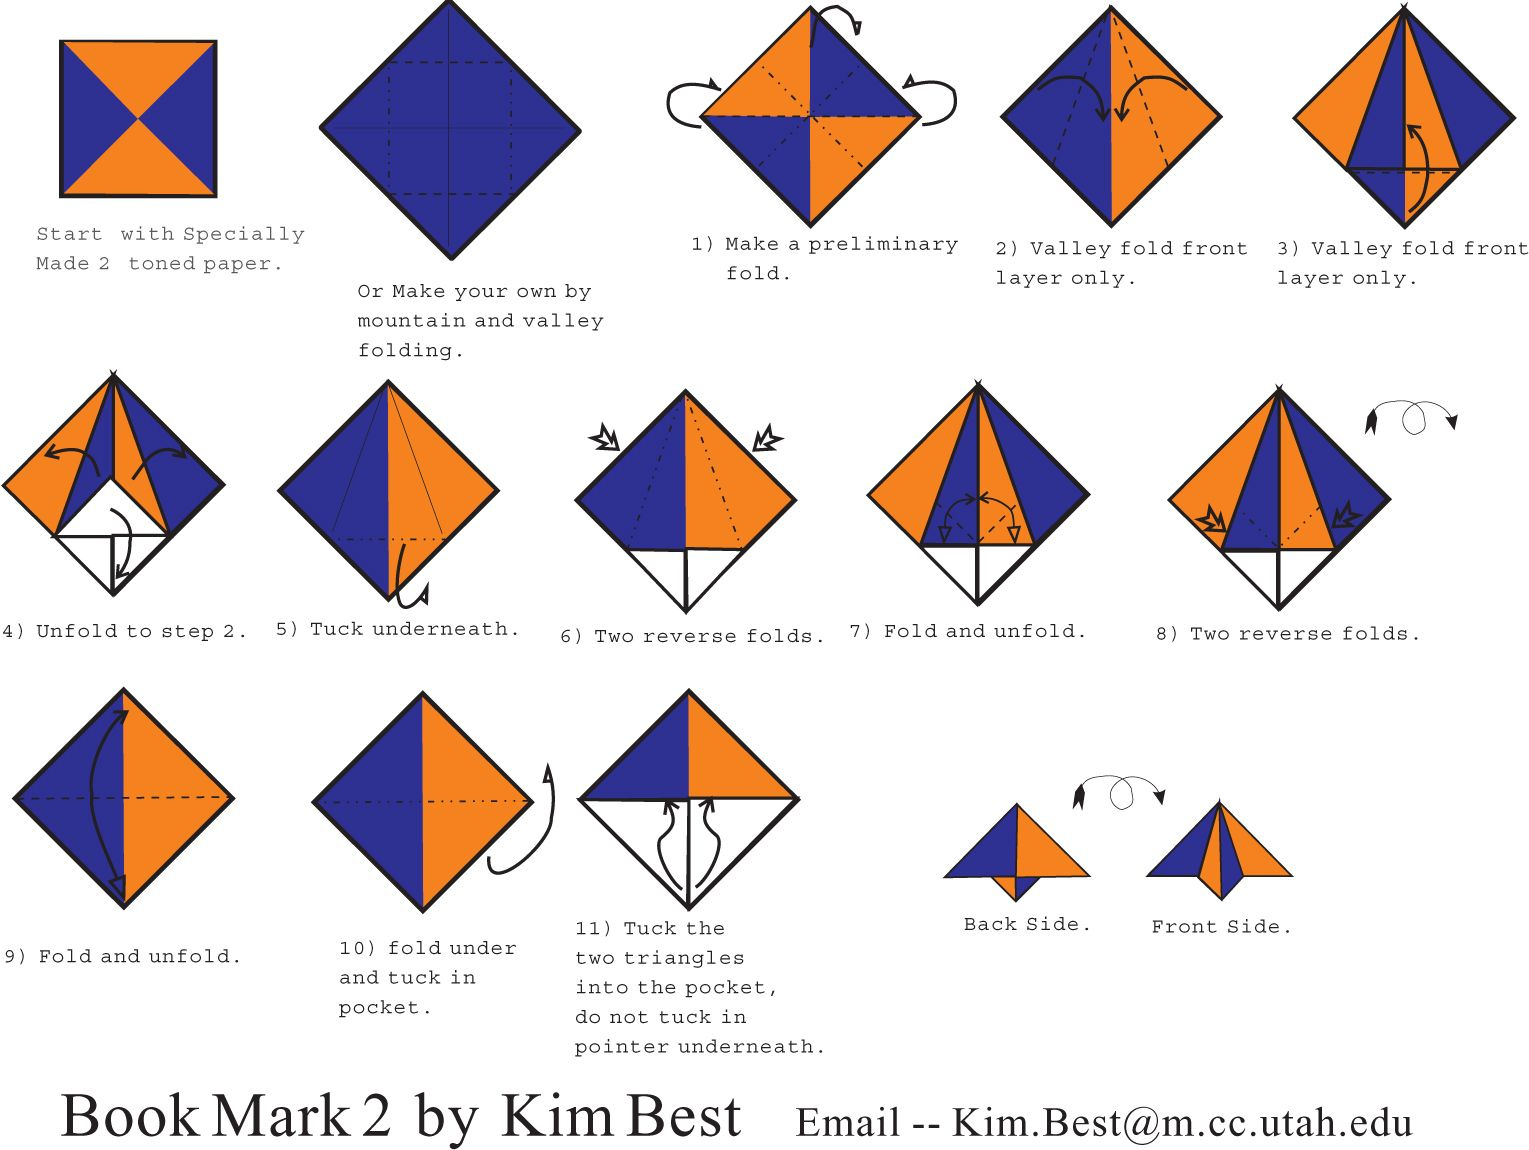
If you're a book lover, you know how important it is to keep your place while reading. One creative way to do this is with an origami corner bookmark. Not only is it functional, but it's also a beautiful and unique way to add some personality to your reading experience. In this article, we'll provide you with printable instructions on how to make your own origami corner bookmark.
To get started, you'll need a square piece of paper. You can use any type of paper you like, but it's best to use a paper that is at least 6 inches by 6 inches. You'll also need a pencil or a ruler to help you make the folds. Our printable instructions will guide you through the process of creating your origami corner bookmark, from the initial folds to the final product.
Tips and Variations for Your Origami Corner Bookmark
Once you have your paper and tools ready, you can start making your origami corner bookmark. The process is relatively simple and requires only a few folds. Our printable instructions will show you how to make the necessary folds to create the bookmark. You can customize your bookmark by using different colors or patterns of paper, or by adding decorations such as stickers or stamps.
One of the best things about origami corner bookmarks is that you can customize them to fit your personal style. You can use different colors or patterns of paper, or add decorations such as stickers or stamps. You can also experiment with different folds and designs to create a unique bookmark. With our printable instructions, you'll be able to create a beautiful and functional origami corner bookmark that will add a touch of personality to your reading experience.