How to Make a Paper Airplane: A Step-by-Step Guide

Getting Started with Your Paper Airplane
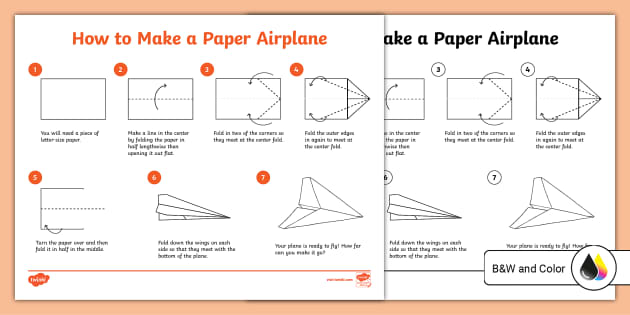
Making a paper airplane is a fun and easy activity that can be enjoyed by people of all ages. With just a few simple folds, you can create a plane that will soar through the air and bring a smile to your face. In this article, we will provide you with printable instructions to make a paper airplane, so you can get started right away.
To begin, you will need a piece of paper. Any type of paper will work, but it's best to use a square piece of paper that is at least 8.5 x 8.5 inches in size. You will also need a pencil or a ruler to help you make straight folds. Once you have your paper, you can start folding it according to the instructions provided below.
Tips and Tricks for Flying Your Paper Airplane
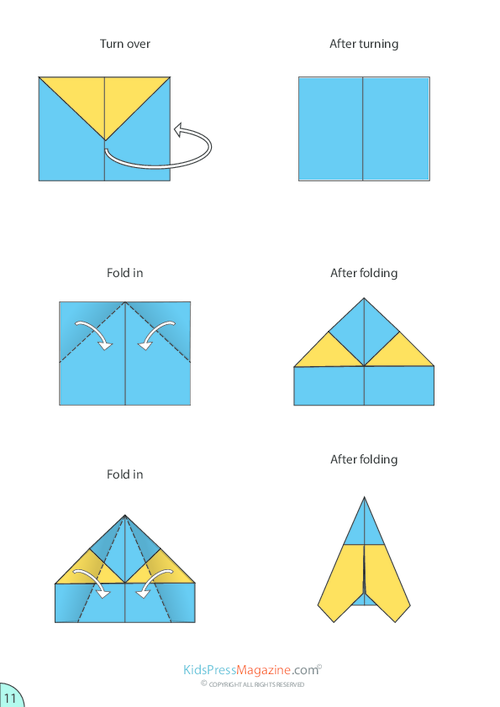
The first step in making a paper airplane is to fold the paper in half diagonally to create a crease in the middle. Next, you will need to fold the top left and right corners of the paper down so that they meet the middle crease. Make sure the edges are even and symmetrical, as this will affect the flight of the plane. Then, you will need to fold the bottom left and right corners of the paper up so that they meet the middle crease, making sure to tuck them under the top corners.
Once you have made your paper airplane, you can start flying it. To do this, simply hold the plane by the middle crease and gently toss it forward. Make sure to throw the plane level and straight, as this will help it fly smoothly and evenly. With a little practice, you should be able to get your paper airplane to fly across the room. You can also try experimenting with different folding techniques and designs to create different types of paper airplanes.