Mastering the Violin Finger Chart: A Beginner's Guide


Understanding the Violin Finger Chart
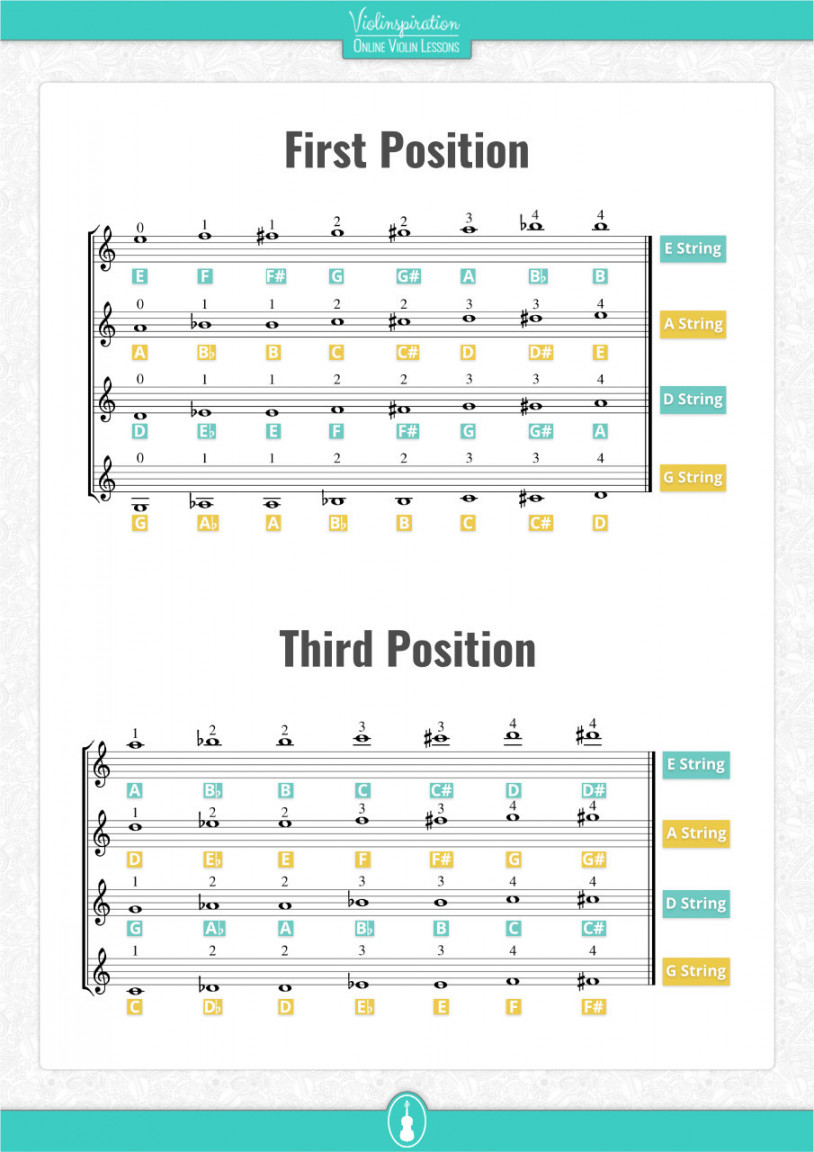
Learning to play the violin can be a daunting task, especially for beginners. One of the most essential tools to help you improve your skills is the violin finger chart. A violin finger chart is a diagram that shows the location of the fingers on the fingerboard, helping you to learn the correct finger placement for each note. In this article, we will explore the basics of the violin finger chart and how to use it to enhance your playing.
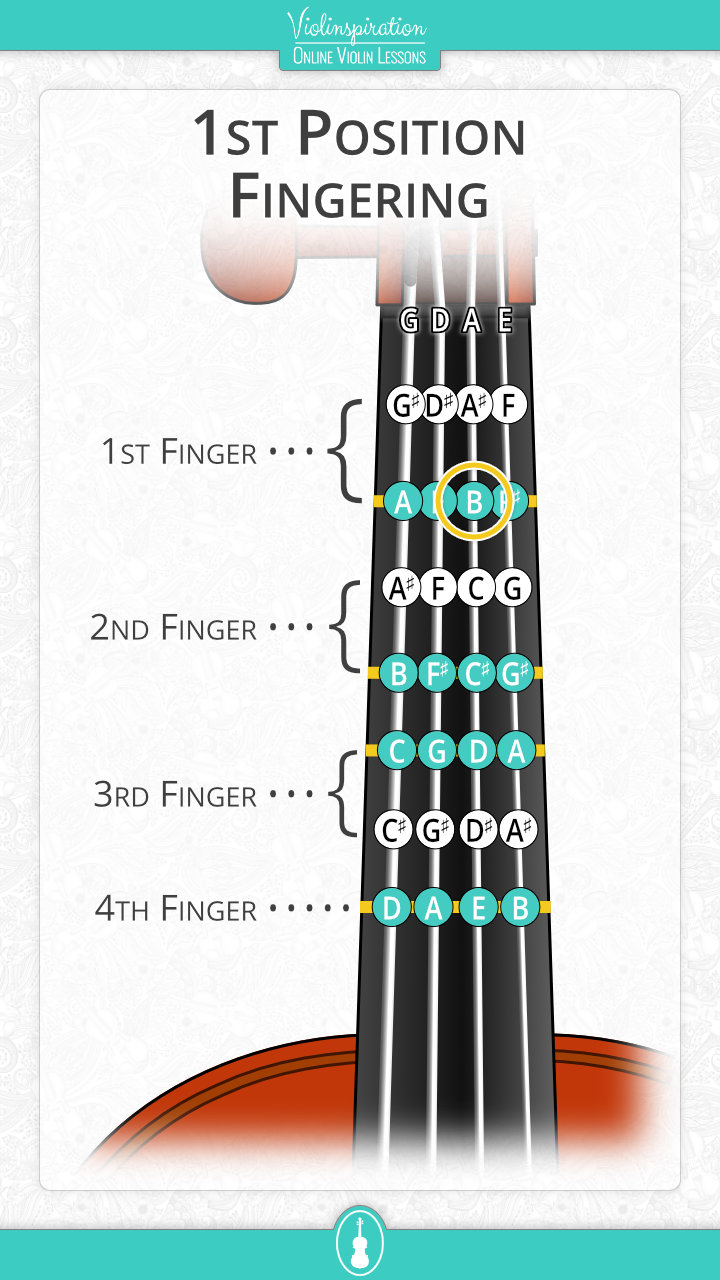
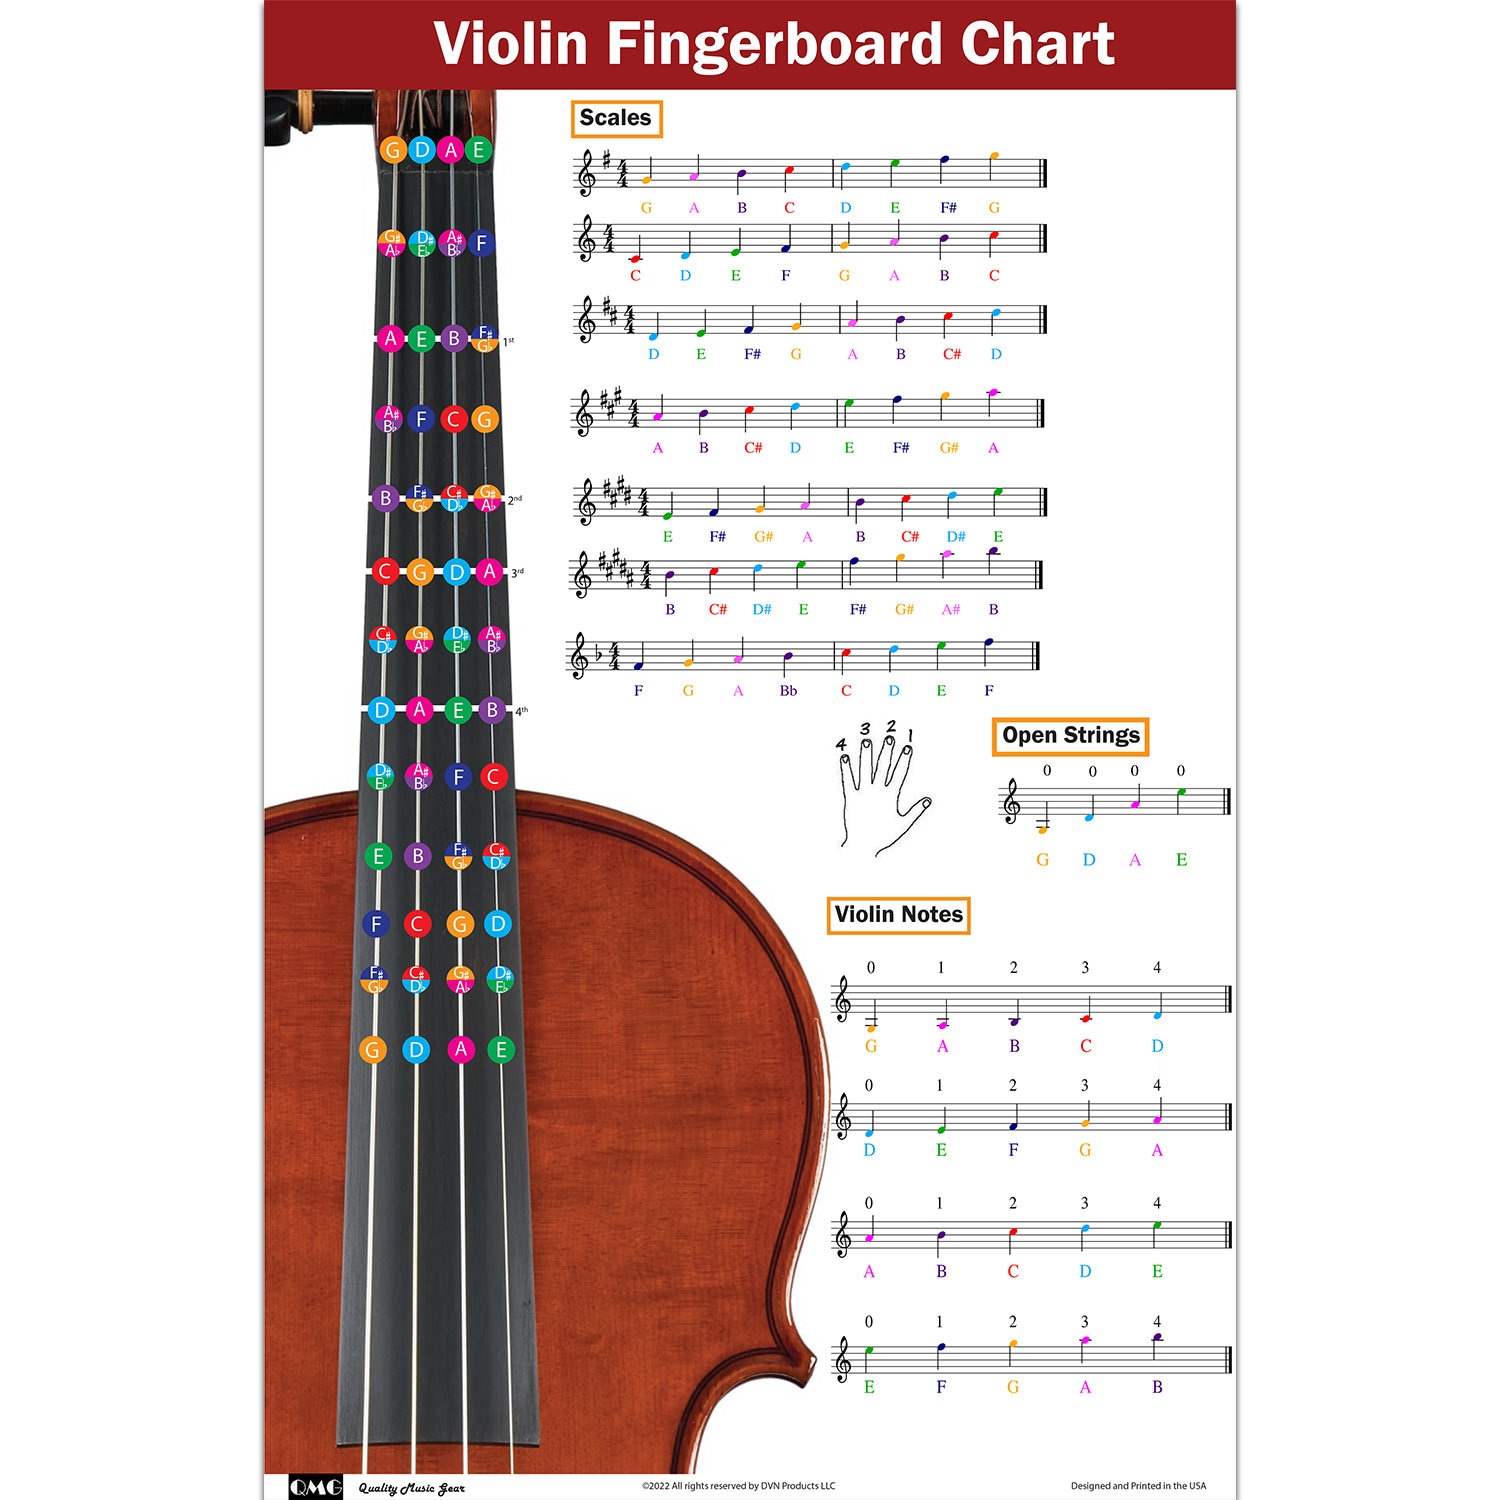
The violin finger chart is typically divided into four sections, each representing a string on the violin. The chart shows the finger numbers and their corresponding notes on the fingerboard. For example, the first finger is placed on the first fret of the string to play a specific note. By using the finger chart, you can learn the correct finger placement for each note and improve your overall technique.
Applying the Finger Chart to Your Playing
To get the most out of the violin finger chart, it's essential to understand how to read it. The chart is usually labeled with the finger numbers (1-4) and the corresponding notes on the staff. You can start by practicing the notes on each string, using the finger chart as a guide. As you become more comfortable with the finger placement, you can begin to play simple melodies and exercises.
Once you have a good understanding of the violin finger chart, you can start applying it to your playing. Start by practicing scales and arpeggios, using the finger chart to ensure correct finger placement. As you progress, you can begin to play more complex pieces, using the finger chart to help you navigate the fingerboard. With consistent practice and dedication, you can master the violin finger chart and take your playing to the next level.