Cricut Printable Vinyl Guide: A Comprehensive Tutorial
Getting Started with Cricut Printable Vinyl
If you're new to the world of Cricut crafting, you might be wondering what all the fuss is about when it comes to printable vinyl. This versatile material can be used to create a wide range of projects, from custom signs and decals to intricate designs and patterns. In this guide, we'll take you through the basics of working with Cricut printable vinyl, including how to cut, weed, and apply it like a pro.
One of the best things about Cricut printable vinyl is its ease of use. With the right tools and a little practice, you can create professional-looking results that will impress friends and family. To get started, you'll need a few basic supplies, including a Cricut machine, printable vinyl, and a weeding tool. You'll also want to make sure you have a design in mind, whether it's a simple shape or a complex pattern.
Tips and Tricks for Working with Cricut Printable Vinyl
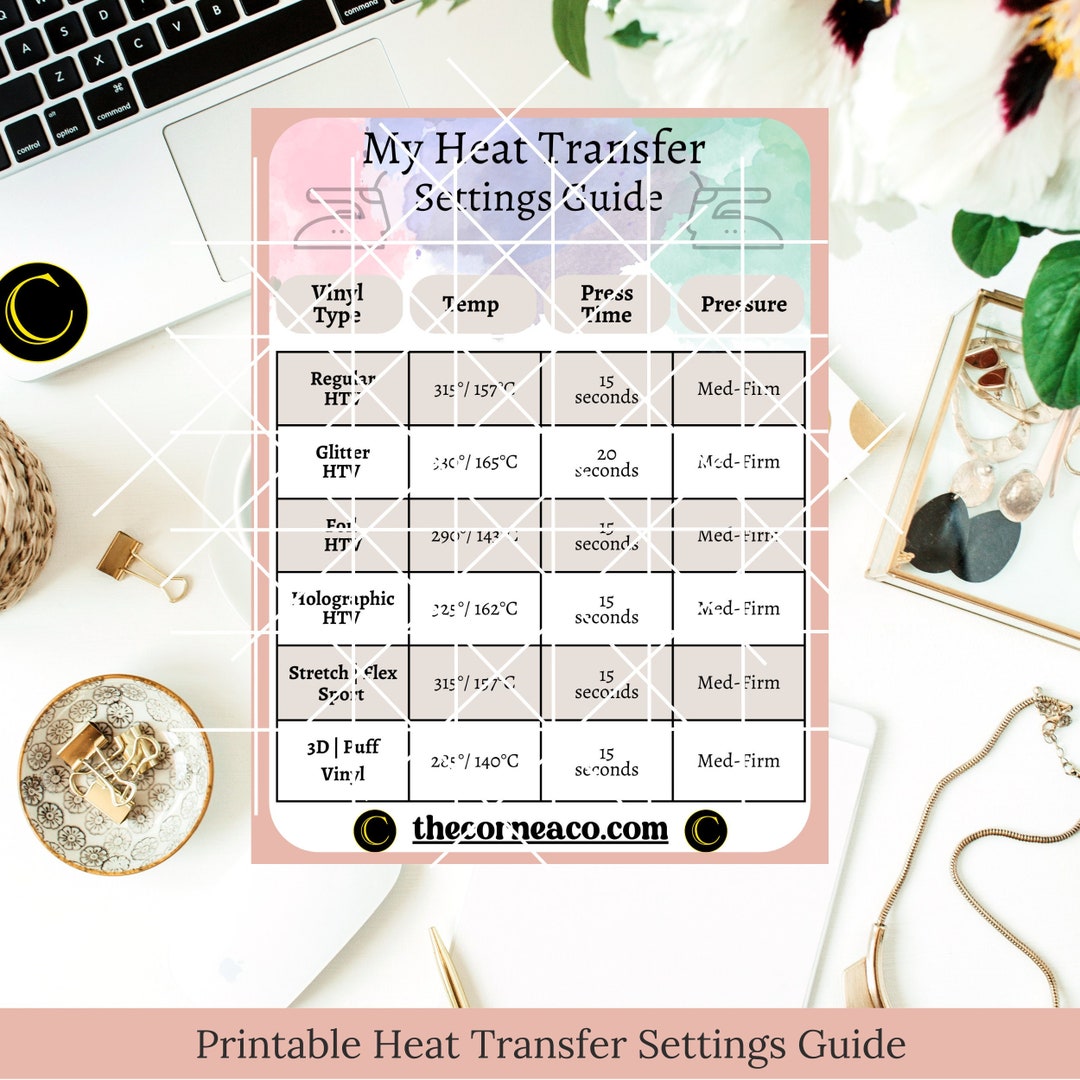
When it comes to cutting Cricut printable vinyl, the key is to use the right settings on your machine. You'll want to select the 'vinyl' option and adjust the blade depth and pressure according to the manufacturer's instructions. Once you've cut out your design, use a weeding tool to remove the excess vinyl and transfer tape to apply it to your project. With a little patience and practice, you'll be creating stunning designs in no time.
As you become more comfortable working with Cricut printable vinyl, you'll want to experiment with different techniques and effects. One tip is to use a laminator to add an extra layer of protection to your designs, making them more durable and long-lasting. You can also try layering different colors and patterns of vinyl to create unique and intricate designs. With these tips and tricks, you'll be well on your way to becoming a Cricut printable vinyl expert and creating beautiful, professional-looking projects that will impress anyone.